New to Unrulr? Welcome!
This guide will help you set up a brand new community for your school or organization.
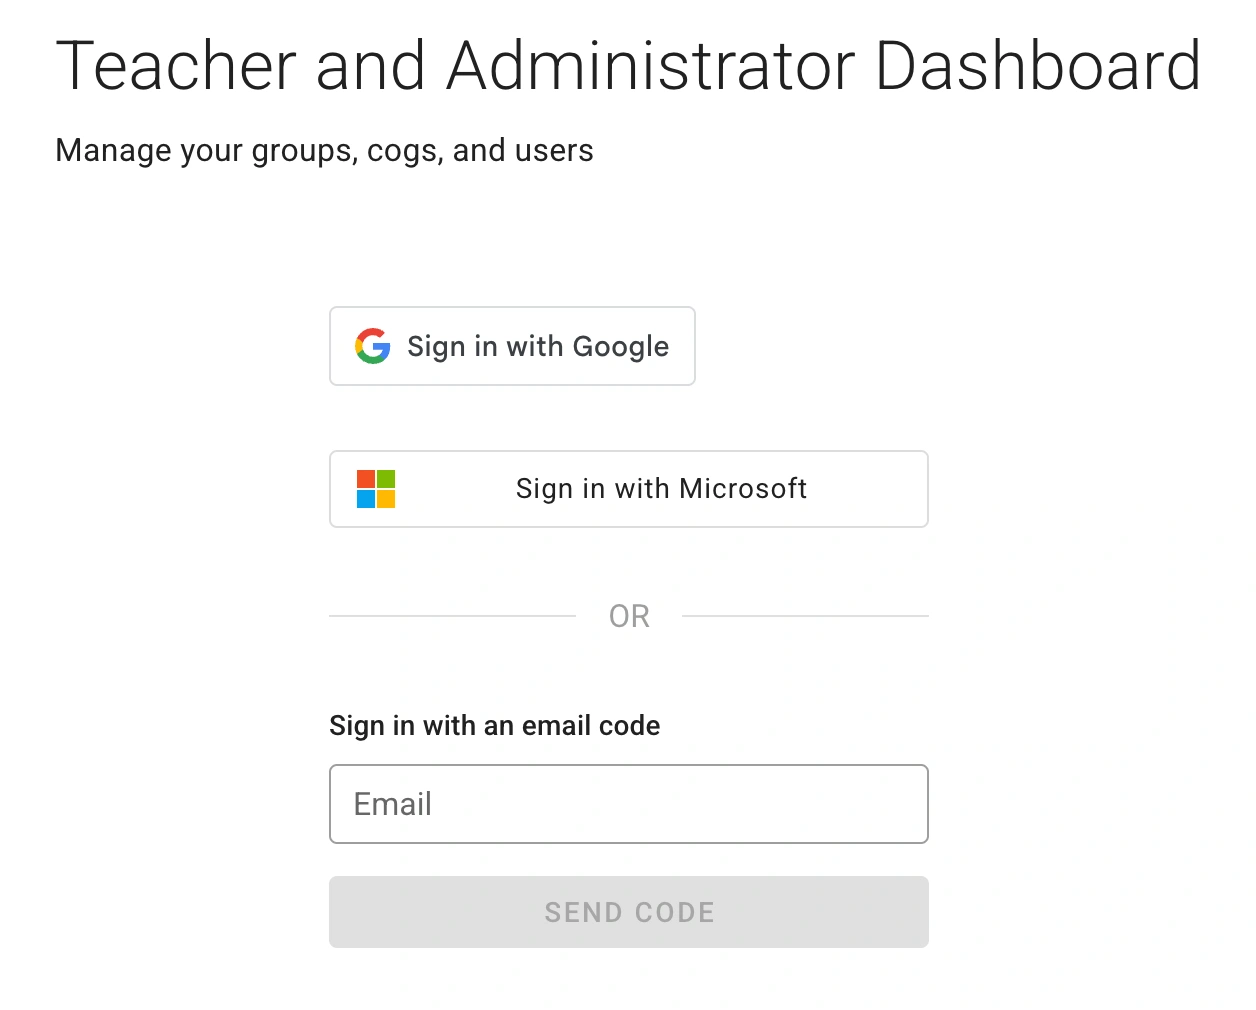
Step 1. Create an Account
Using your browser, go to the Sign-up Page.
Choose your sign in method:
"Sign In with Google"
“Sign In with Microsoft”
“Sign in with Email” (if you don’t use a Google or Microsoft workspace)
Sign in with the account you'd like to use with Unrulr.
This is usually your school account.
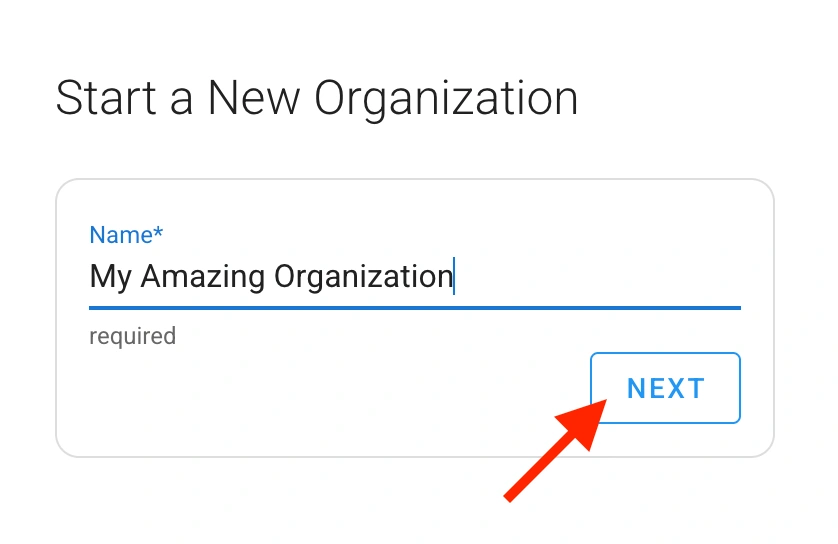
Step 2. Create your Organization
Enter the name of your organization (usually your school name).
Click NEXT.
Step 3. Create Your First Group
Groups are sets of students and teachers who can share with one another. Groups can be classes, project teams, clubs, etc.
You create your first group by either importing a class from Google Classroom or manually building it.
To create your group via Google import:
Click the SYNC button.
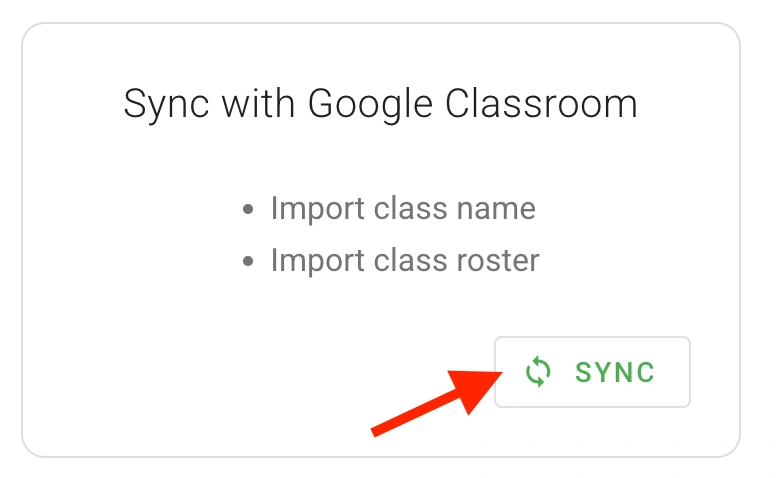
Allow Unrulr to have access to your Google Classroom account.
Choose the class to sync.
To create your group manually:
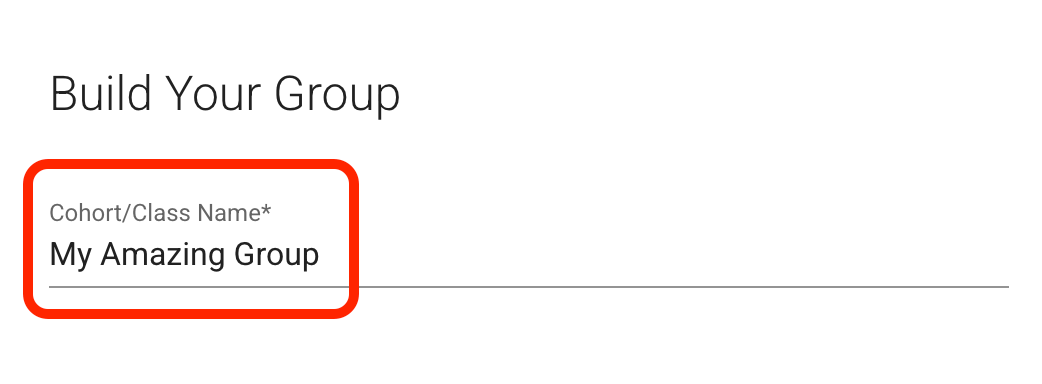
Click the ‘Build’ button in the "Build a Group" box.
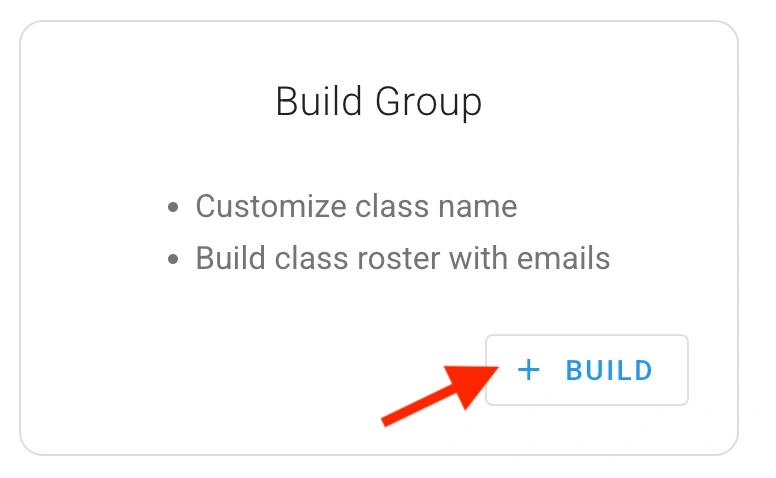
Enter the name of your class/group.
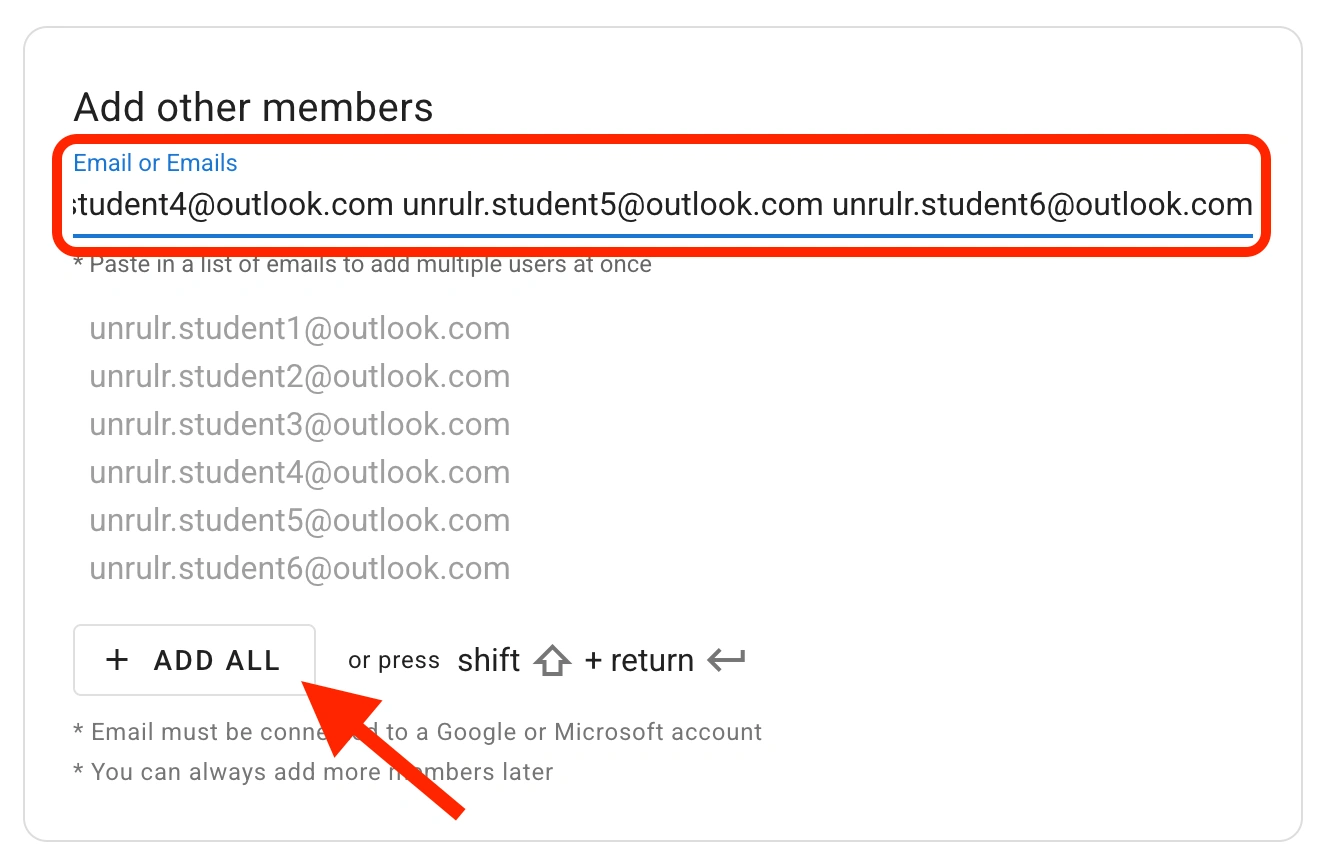
Enter the emails of the members in the class/group.
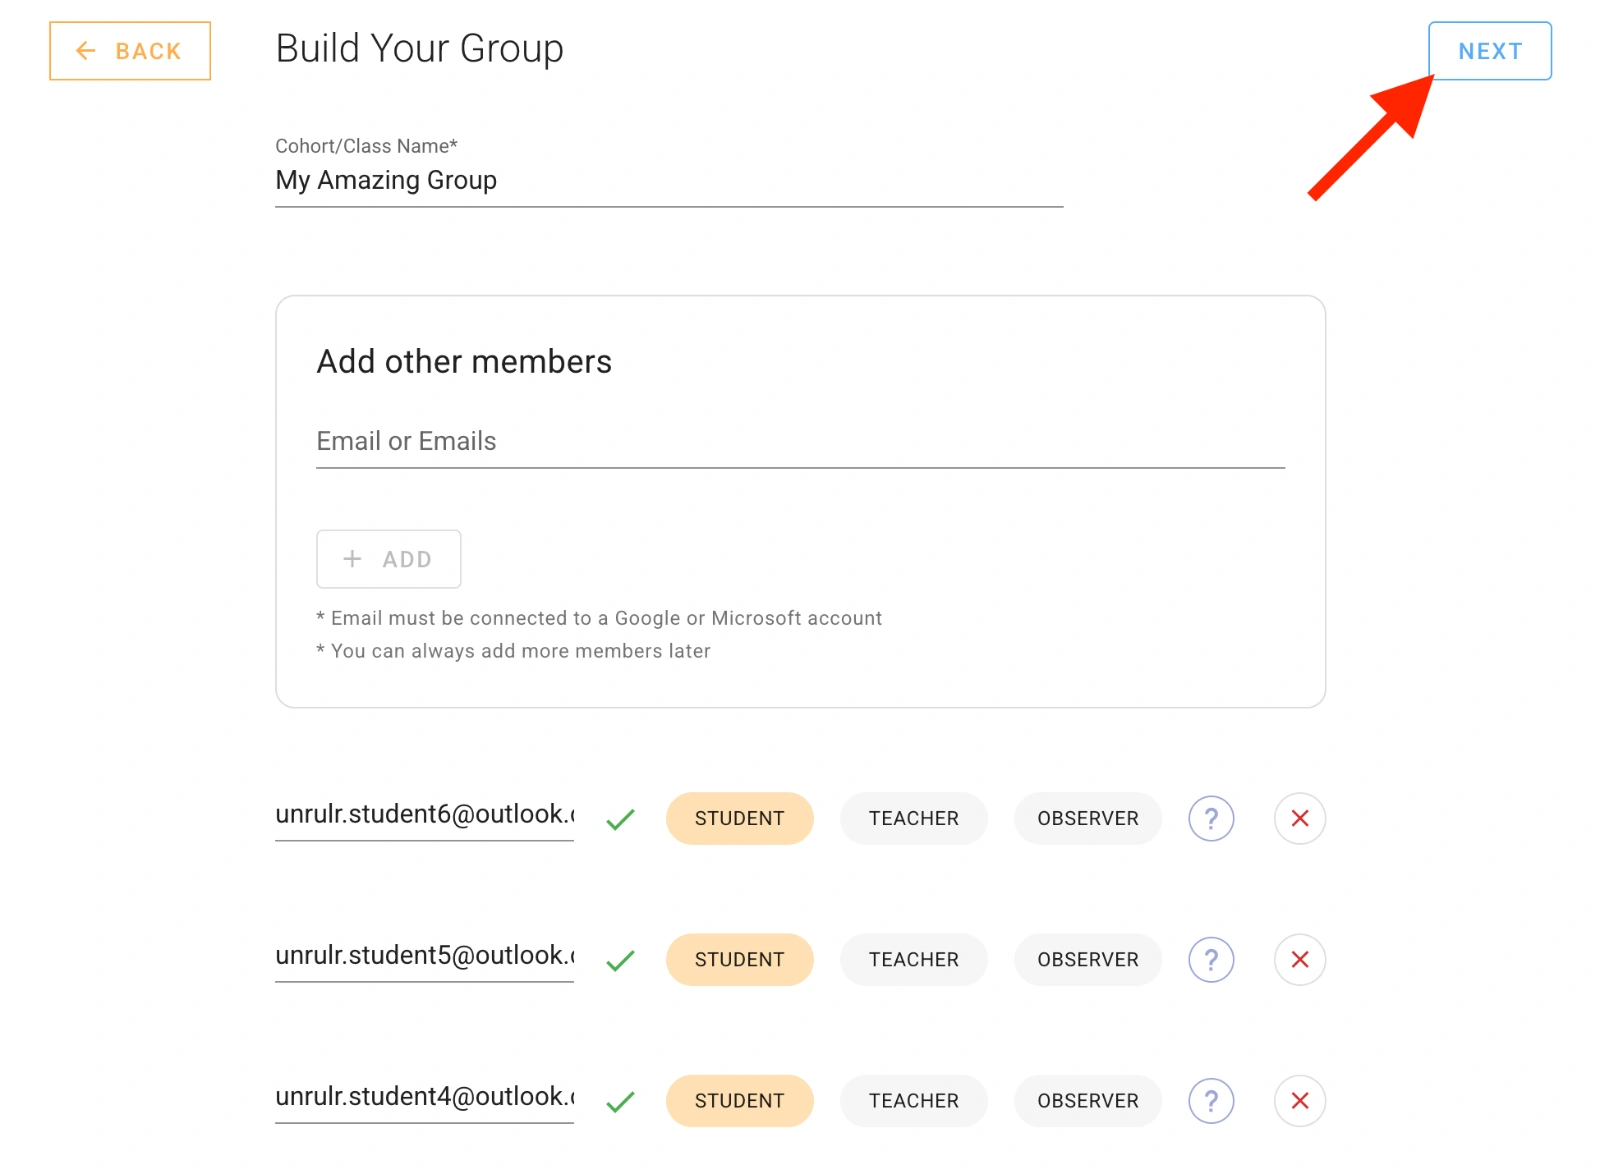
For each email you enter, select student, teacher, or observer.
You may type or paste in more than one address at once. (If all of your addresses are in a column of a spreadsheet, you can copy the column and paste it into the box.)
When adding a list of emails, click ‘ADD ALL’.
Teachers have special abilities. They can:
be shared with separately from student peers
give evaluations that are tabulated separately from those of student peers
moderate posts
make administrative changes to the group
Observers can see all posts shared with the group, but can take no actions
If you are the teacher for the group, make sure you add yourself as a teacher to the group.
You can always add more members or change roles/permissions later.
The accounts you add will get no invitation from the system. The members are able to sign into Unrulr immediately upon completion of your setup.
Click ‘NEXT’ in the upper right of the page.
Step 4. Add Cogs to Your Group
Every learning moment and learning journey in Unrulr is tagged with one or more COGS. By adding COGS to a group, these COGS become available for tagging by the students in that class.
To choose from a library of commonly used cogs:
Click ‘BROWSE’ in the Choose from our Cogs Library box.
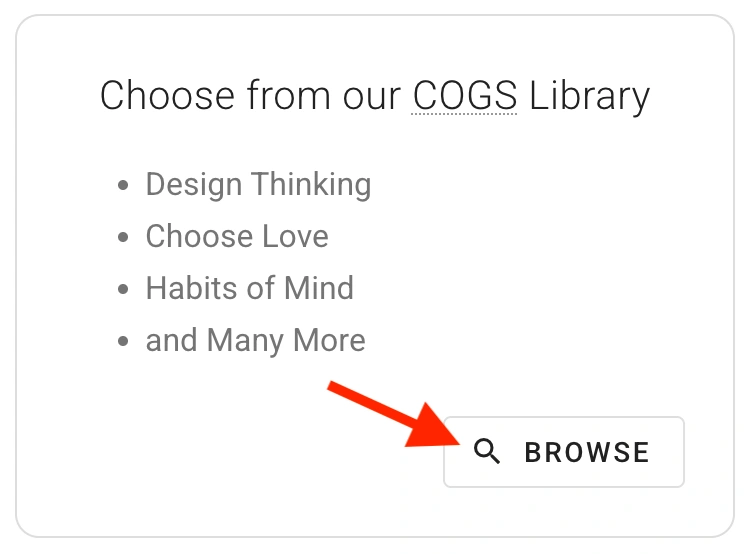
Select one or more COGS sets by clicking the ‘Connect’ button to the right of each set.
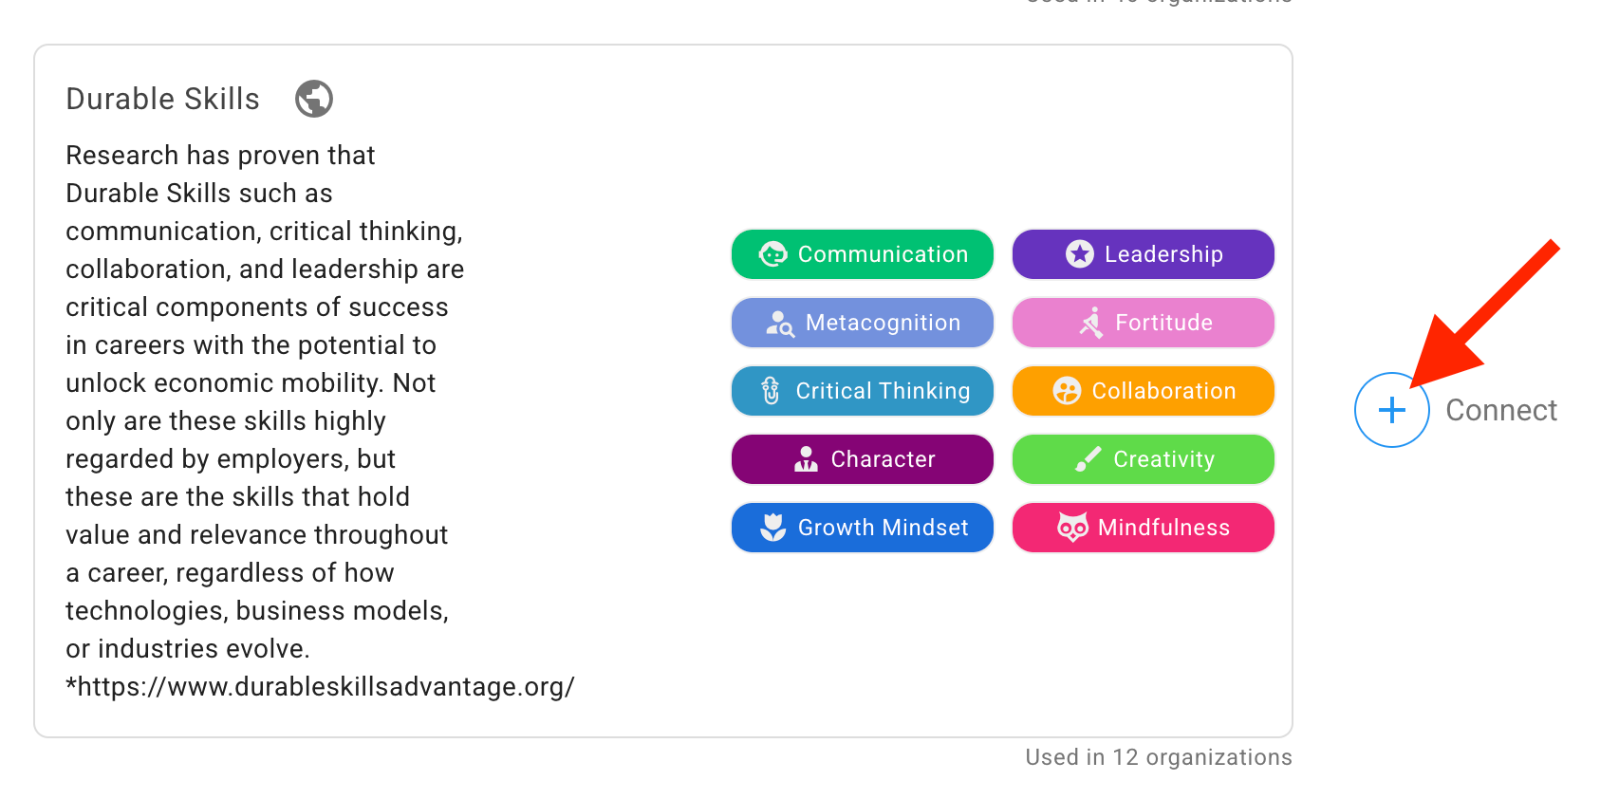
Click ‘NEXT’ in the upper right of the page.
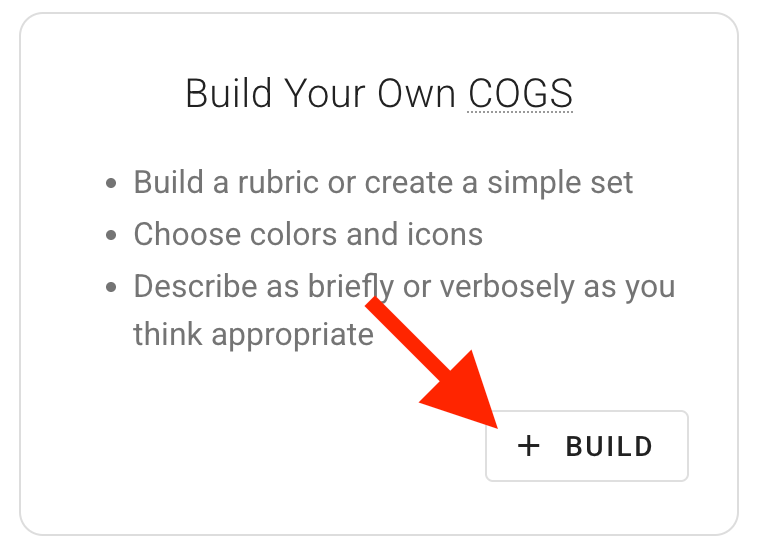
To create your own cogs:
Click ‘BUILD’ in the “Build Your Own COGS” box.
Follow the directions starting from Step 2 of How to Create Your Own COGS.
Step 5. Review Your Set Up and Save
A summary of your setup is displayed.
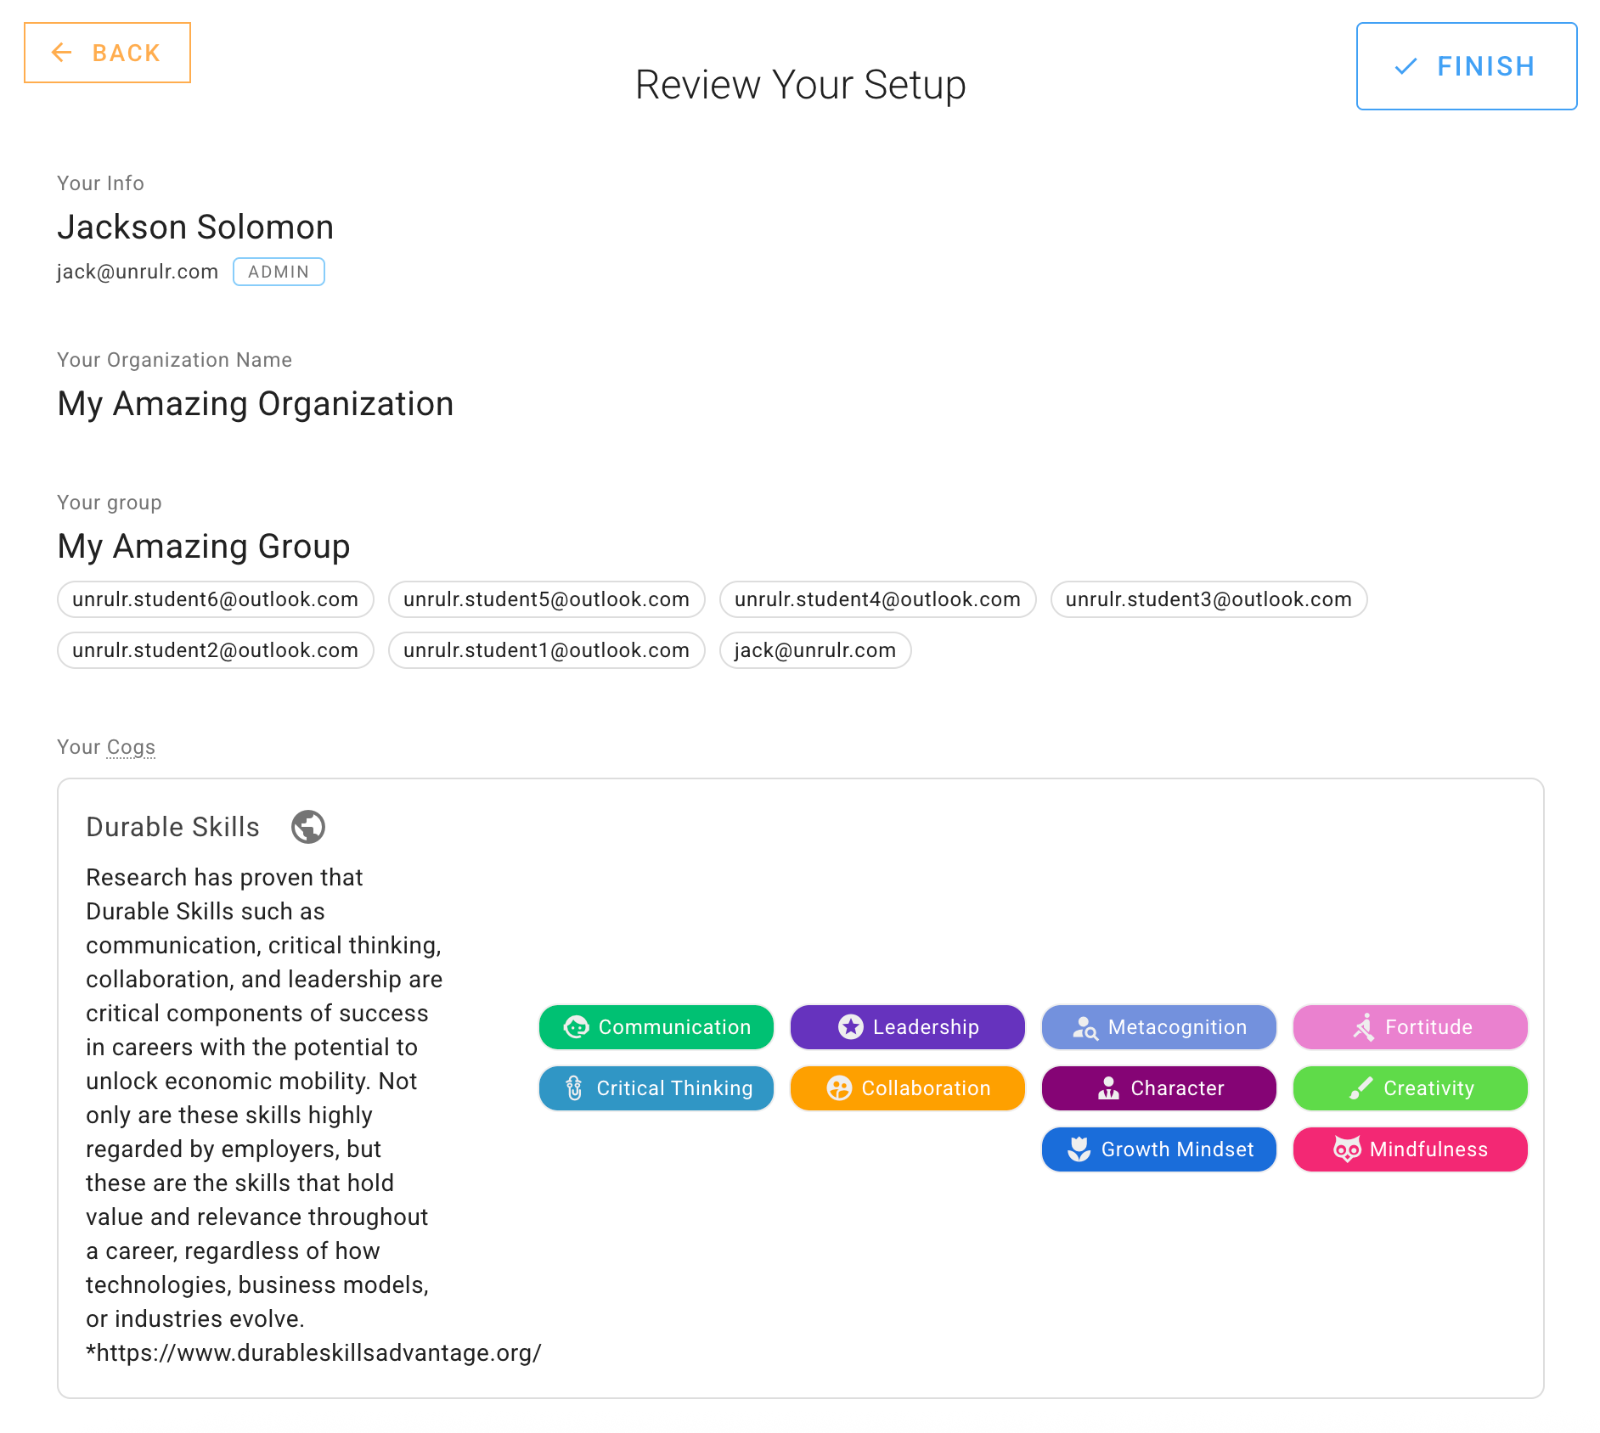
If it looks good, click ‘FINISH’ to save your setup. Otherwise, click ‘BACK’ and make changes.
Step 6. Start Documenting!
Now that you have your organization and group set up, you can jump into the Unrulr app and start documenting right away!
Check out: How do I kick off Unrulr with my students? These step-by-step instructions will get you started with your students.