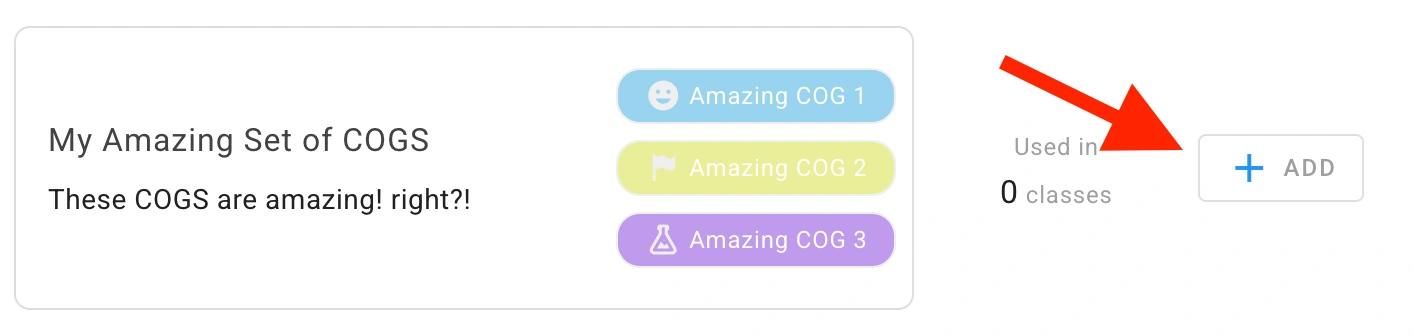
For information on the purpose of cogs see What are COGS?
To create your own COGS, follow the steps below.
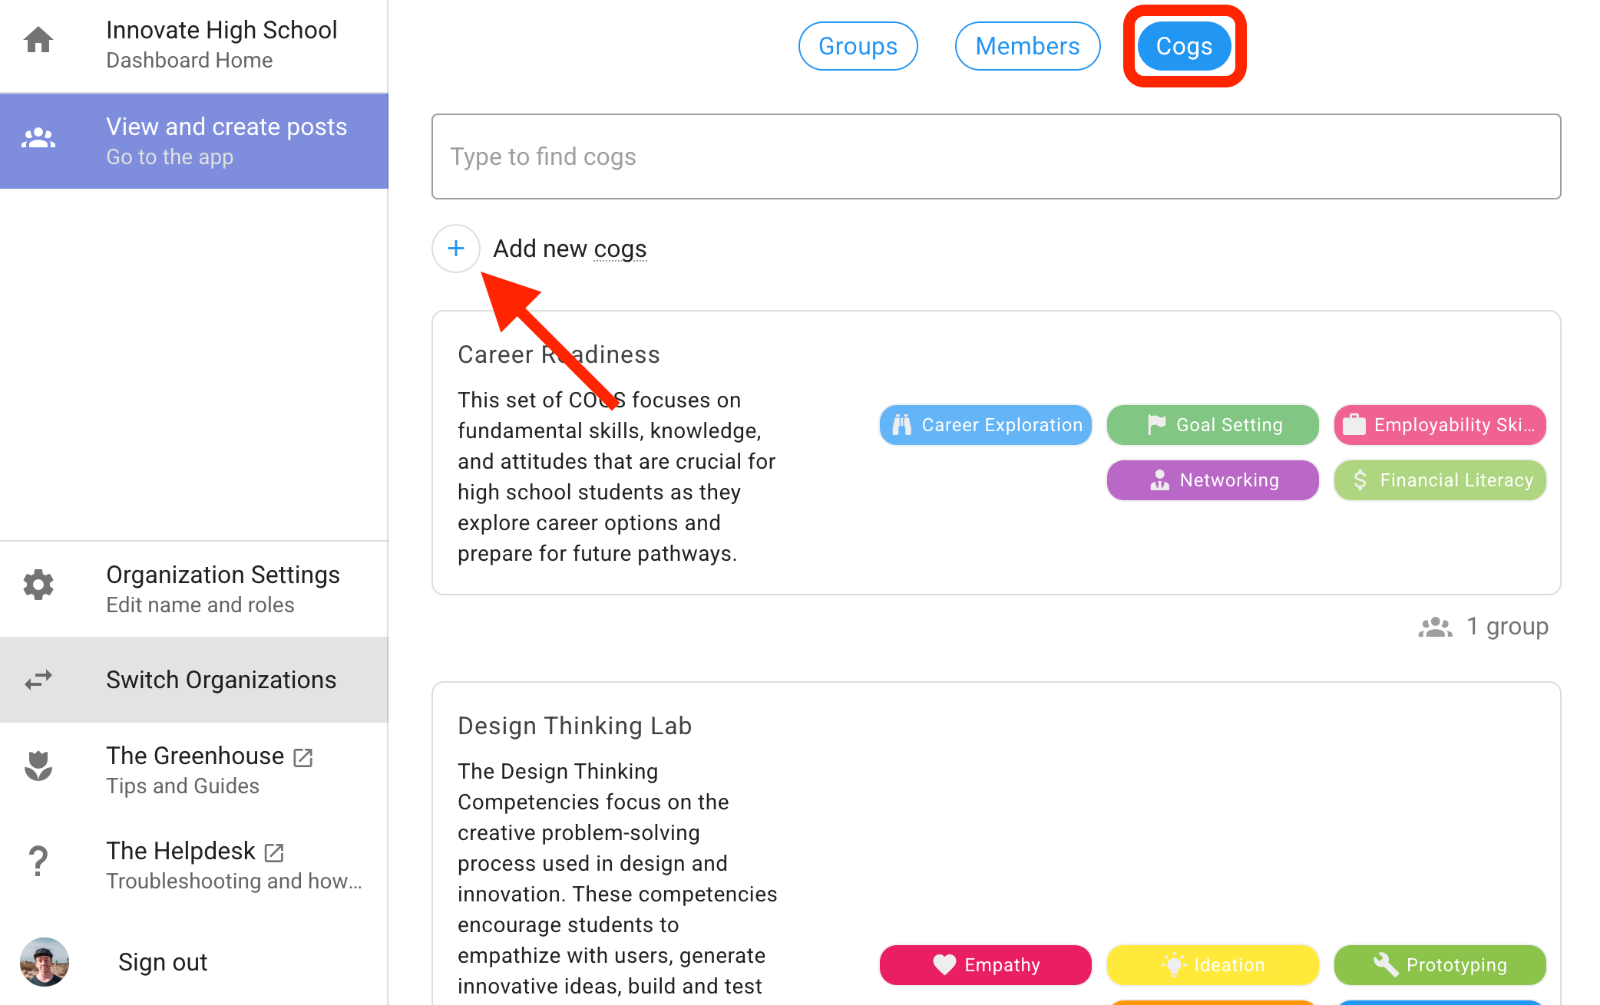
Step 1: Navigate to the COGS creation screen
You can create your own cogs during the initial sign up process (see How do I set up Unrulr?) or from the Admin Dashboard at https://admin.unrulr.com.
From the organization view in the admin dashboard, click the COGS button at the top of the page, and then the plus next to ‘Add new cogs.’
Step 2: Create your cogs
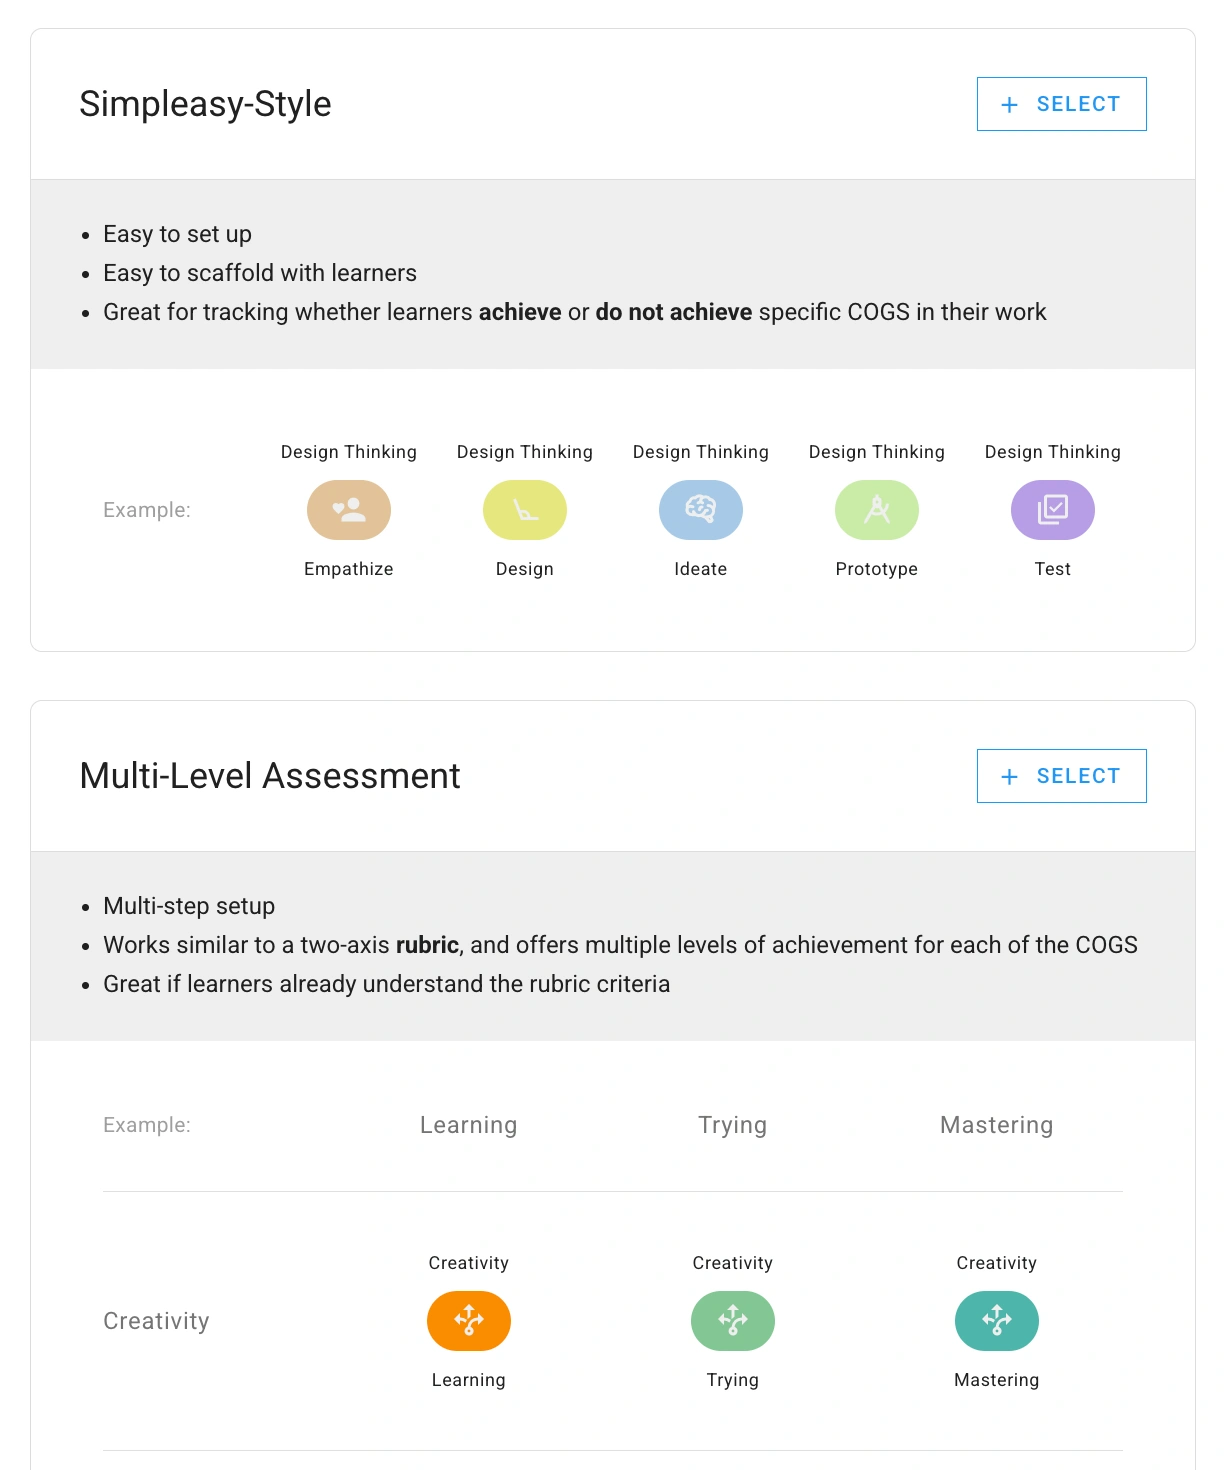
Choose between Simpleasy-Style (single-level) and Multi-level COGS structure. For more info about single-level and multi-level rubrics, see What's the difference between Simpleasy and Multi-Level COGS?
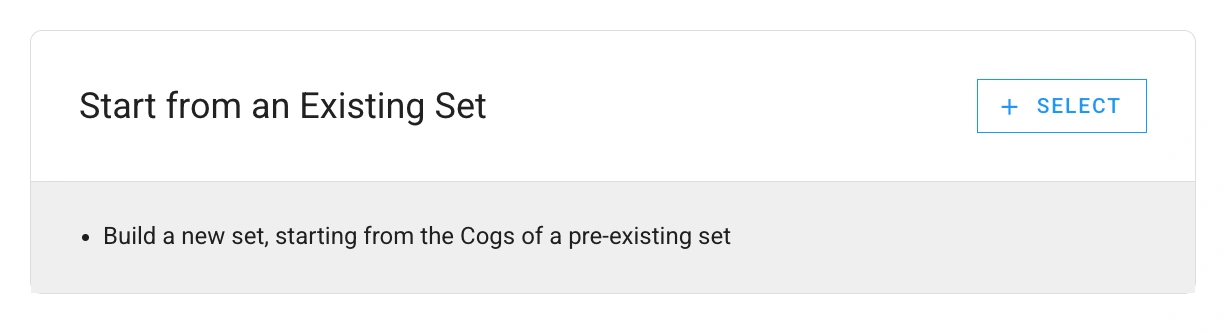
To create new COGS based on an already existing set as a template, choose the ‘Start from Existing Set’ option at the bottom of the page.
For single-level COGS:
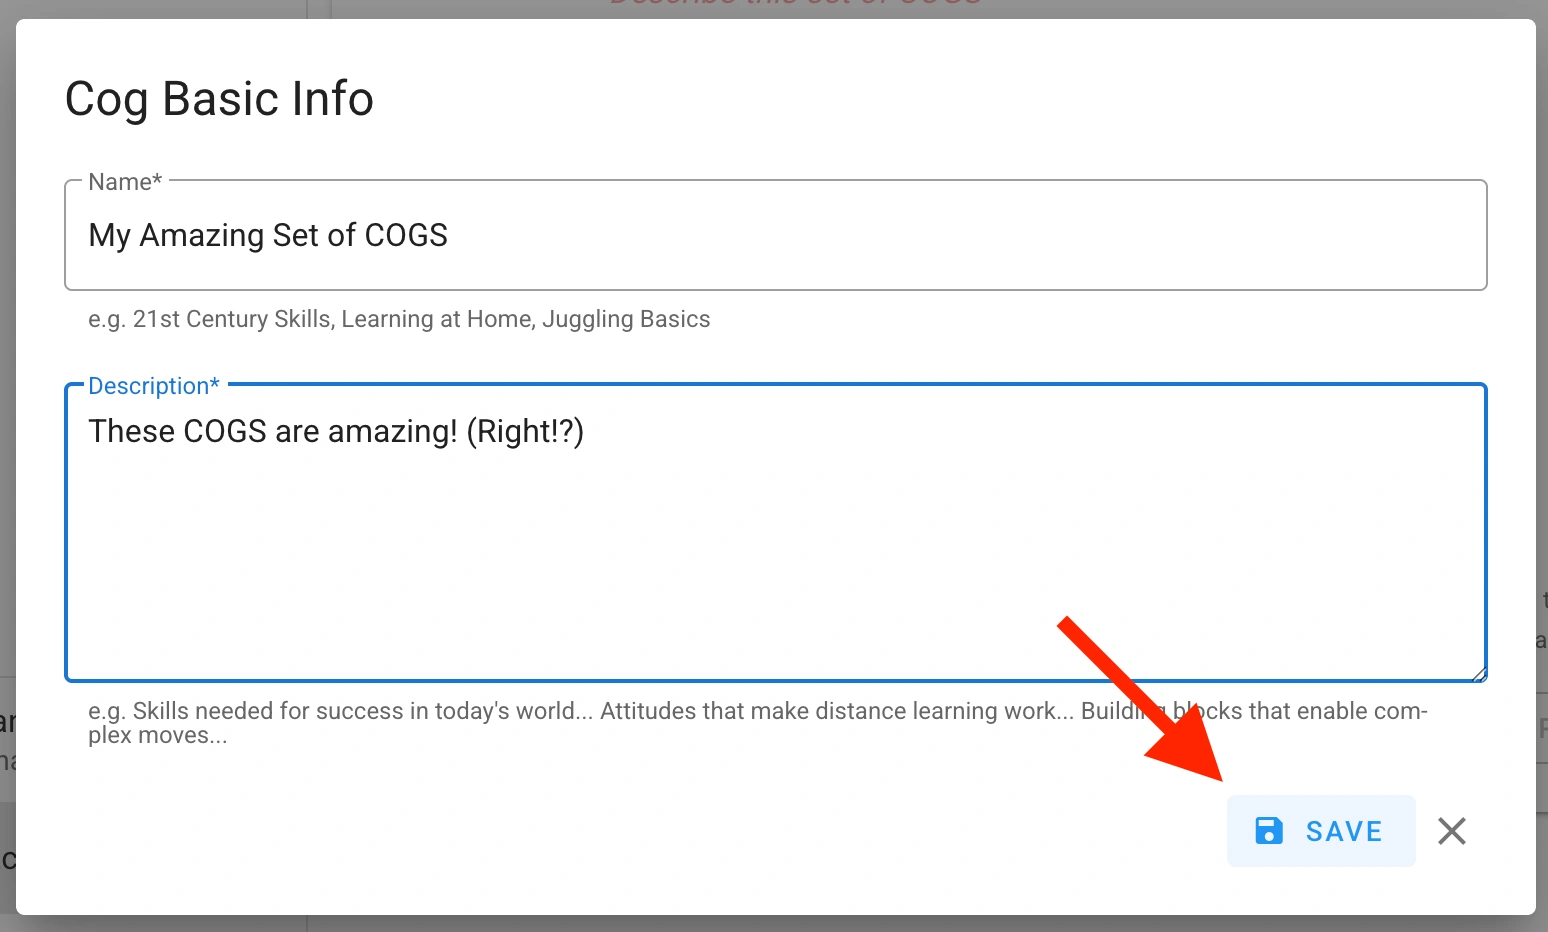
Click the blue pencil next to ‘Name this set of COGS’ and give your COGS set a name and description (the name and description are visible to learners when tagging their posts).
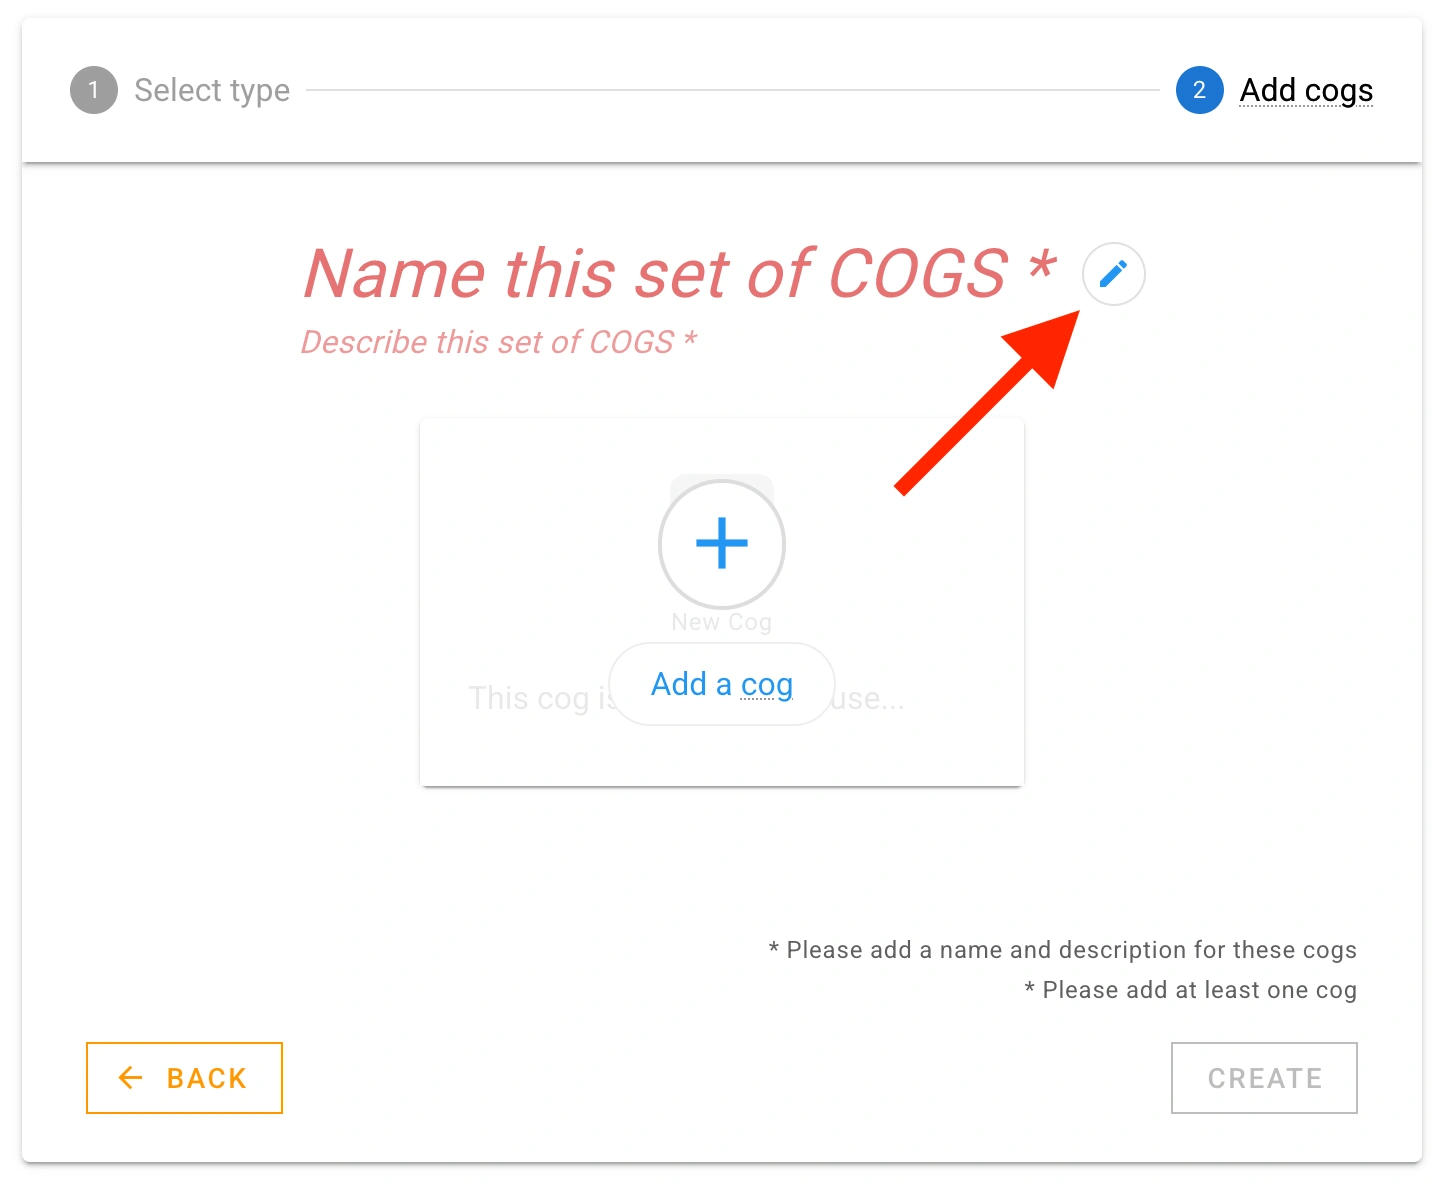
Click ‘SAVE’
Click the blue plus to add a COG to the set.
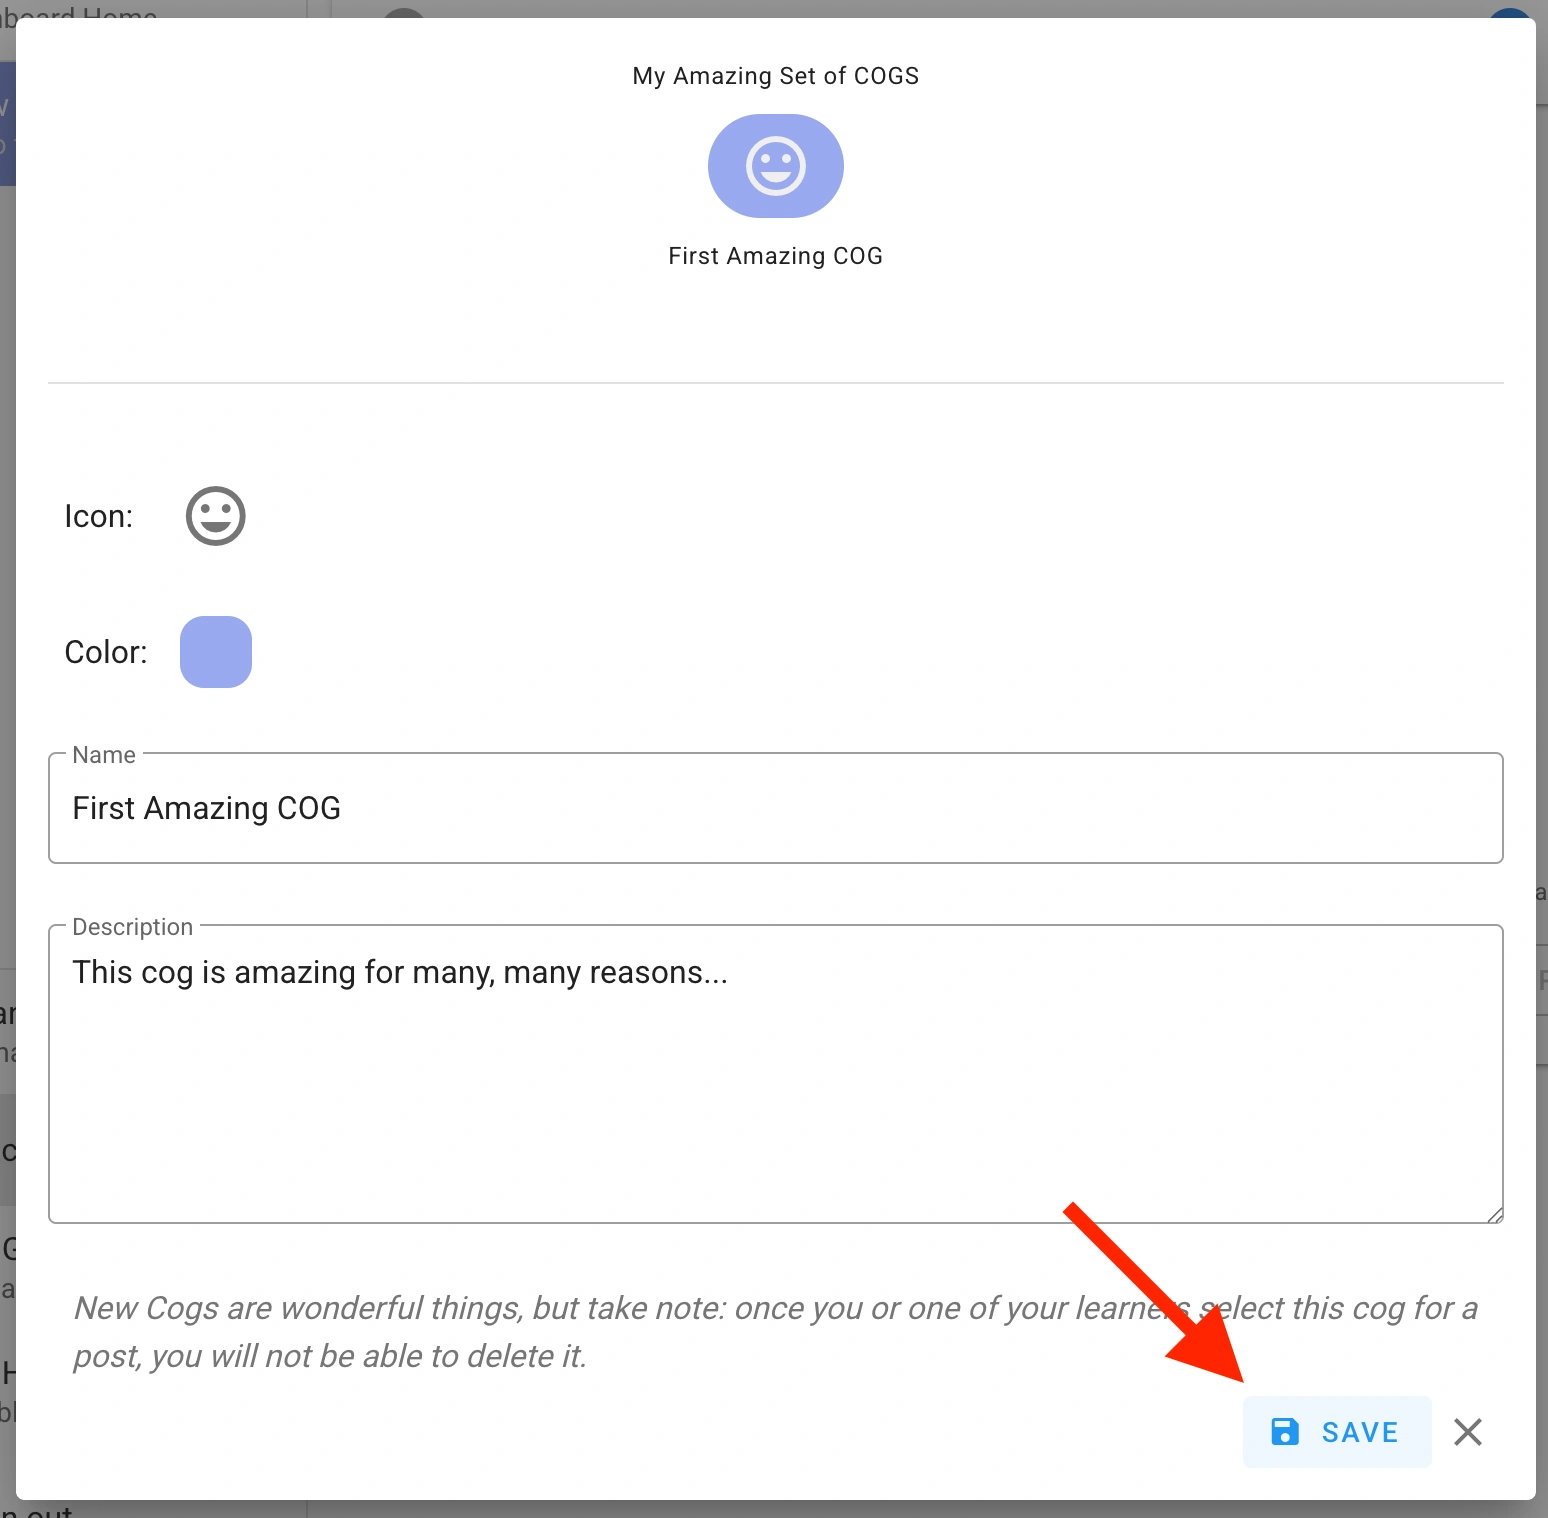
Enter a name and description for this COG.
Click the icon to select an icon for this COG.
Click the color to select a color for this COG.
Click ‘SAVE’.
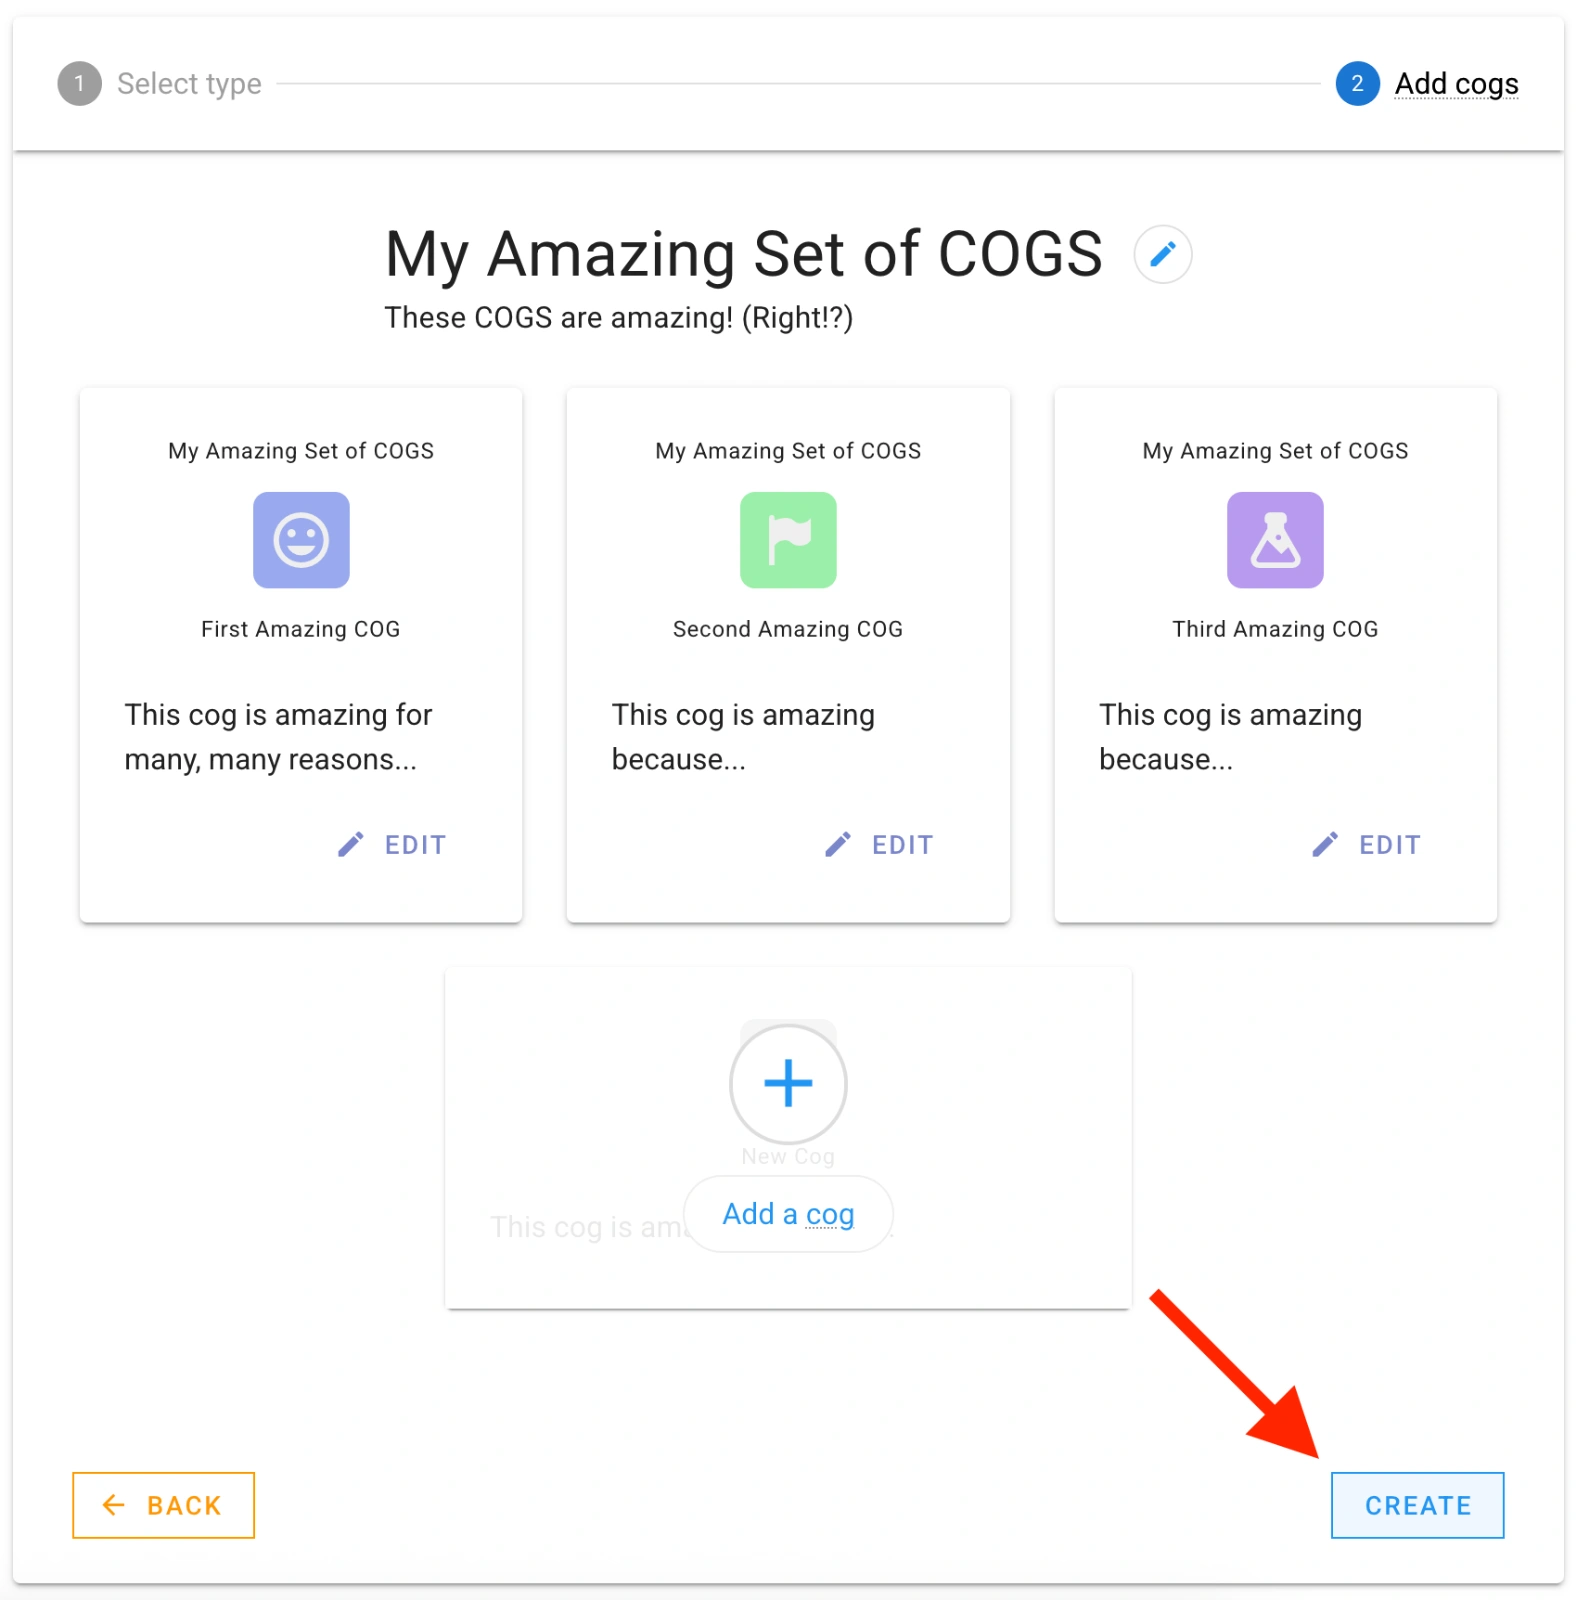
Continue to add COGS until your cog set is complete.
IMPORTANT: Click the ‘CREATE’ button in the bottom right of the screen to save your COGS set.
For multi-level COGS:
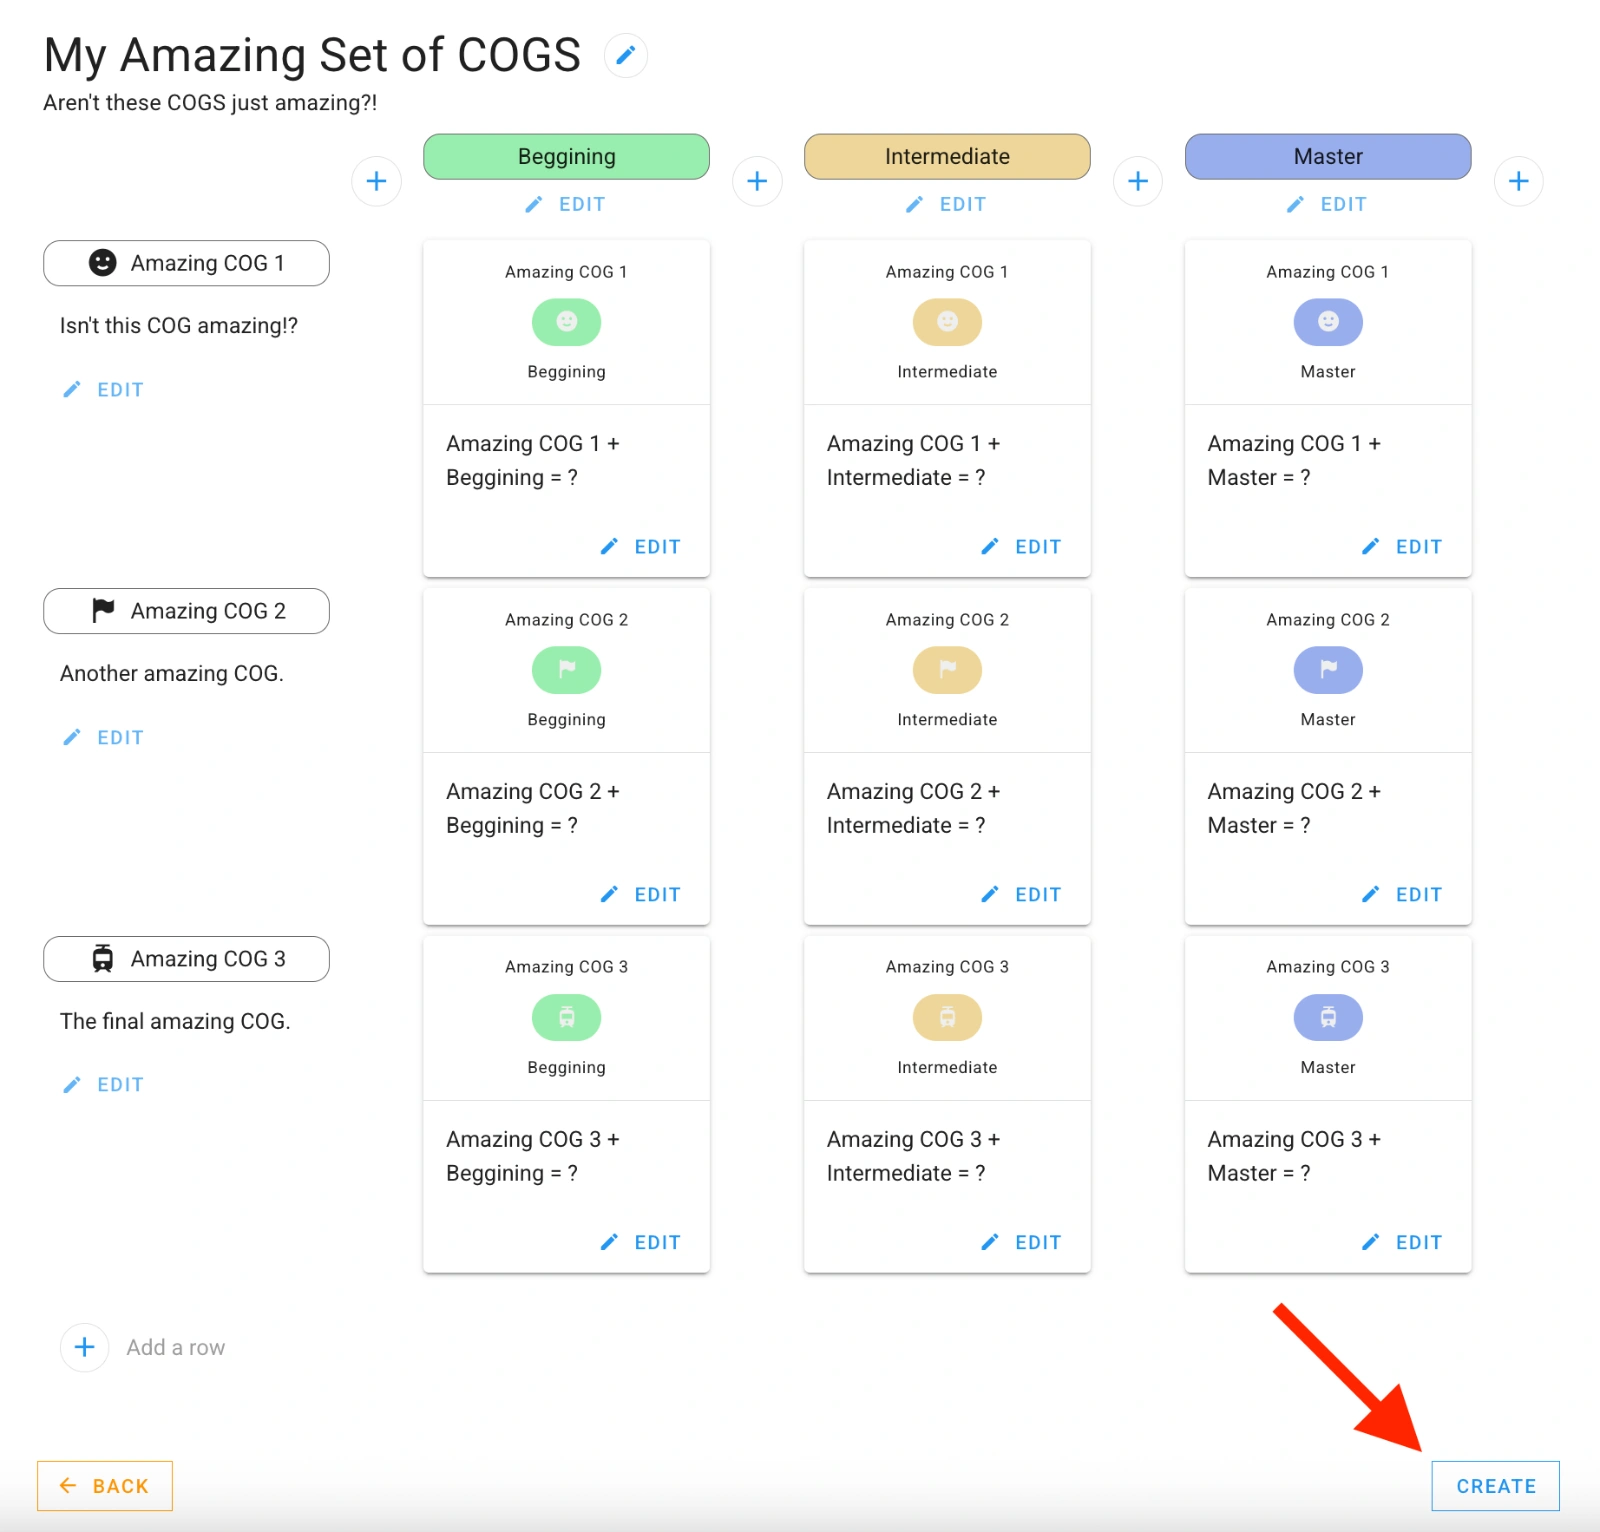
Click the blue pencil next to ‘Name’ and give your cog set a name and description.
Click ‘SAVE’.
At the left, add a row for each COG by clicking the blue ‘+’ circle.
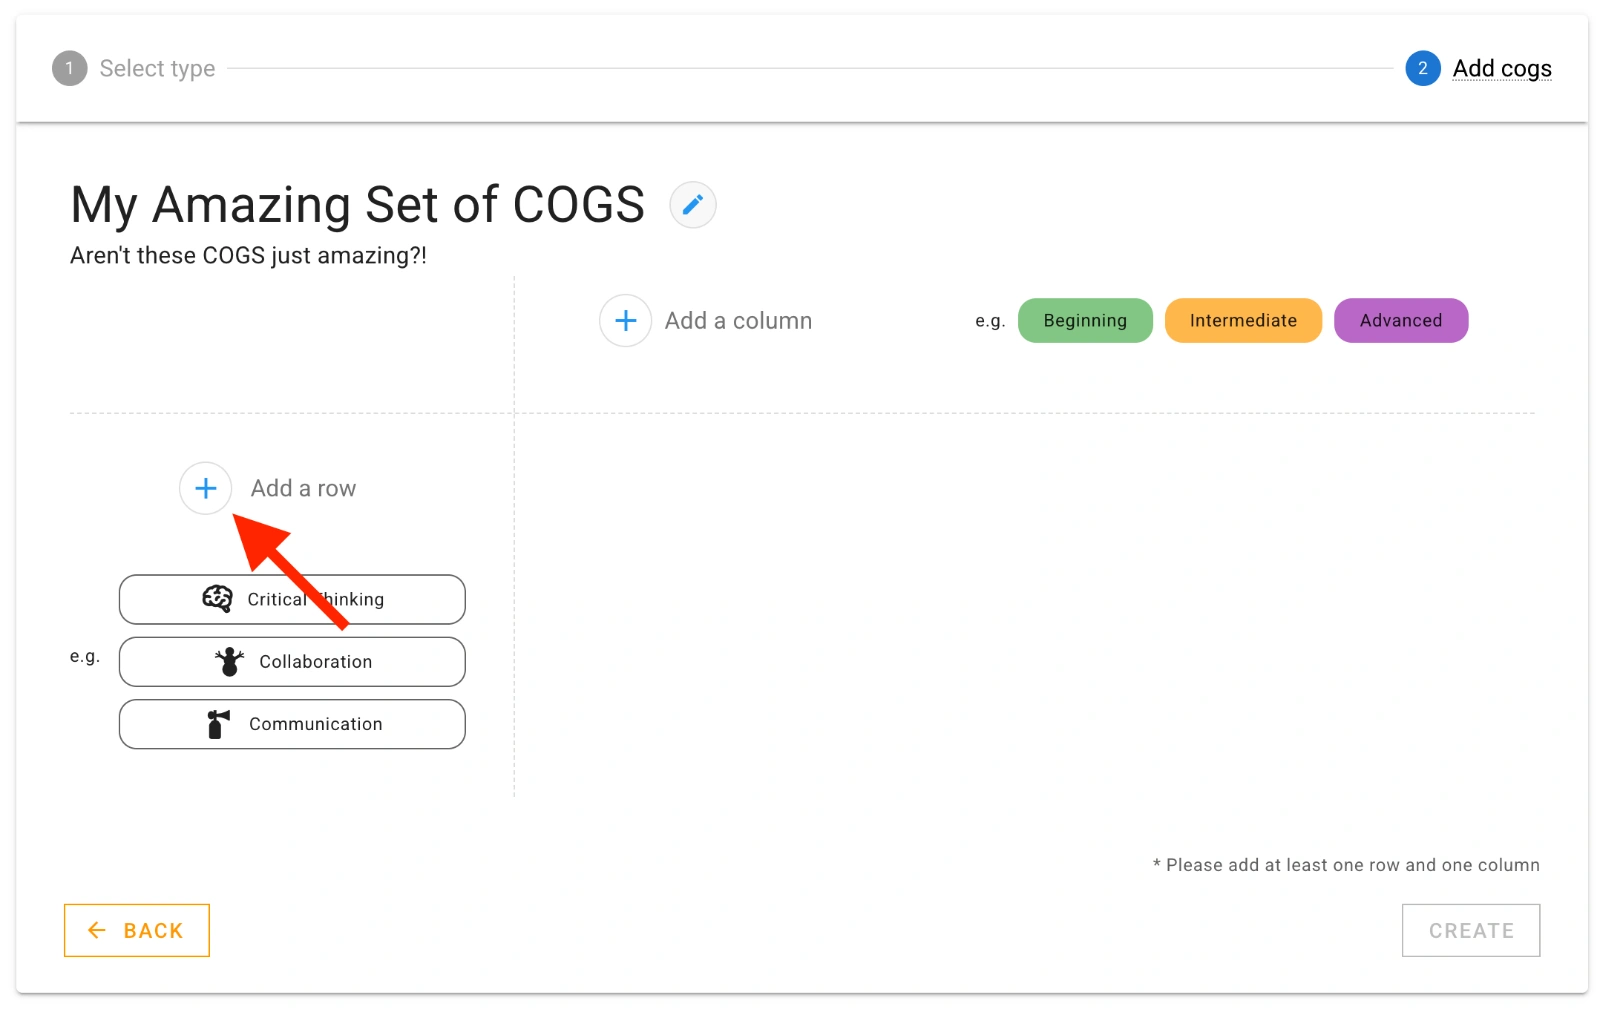
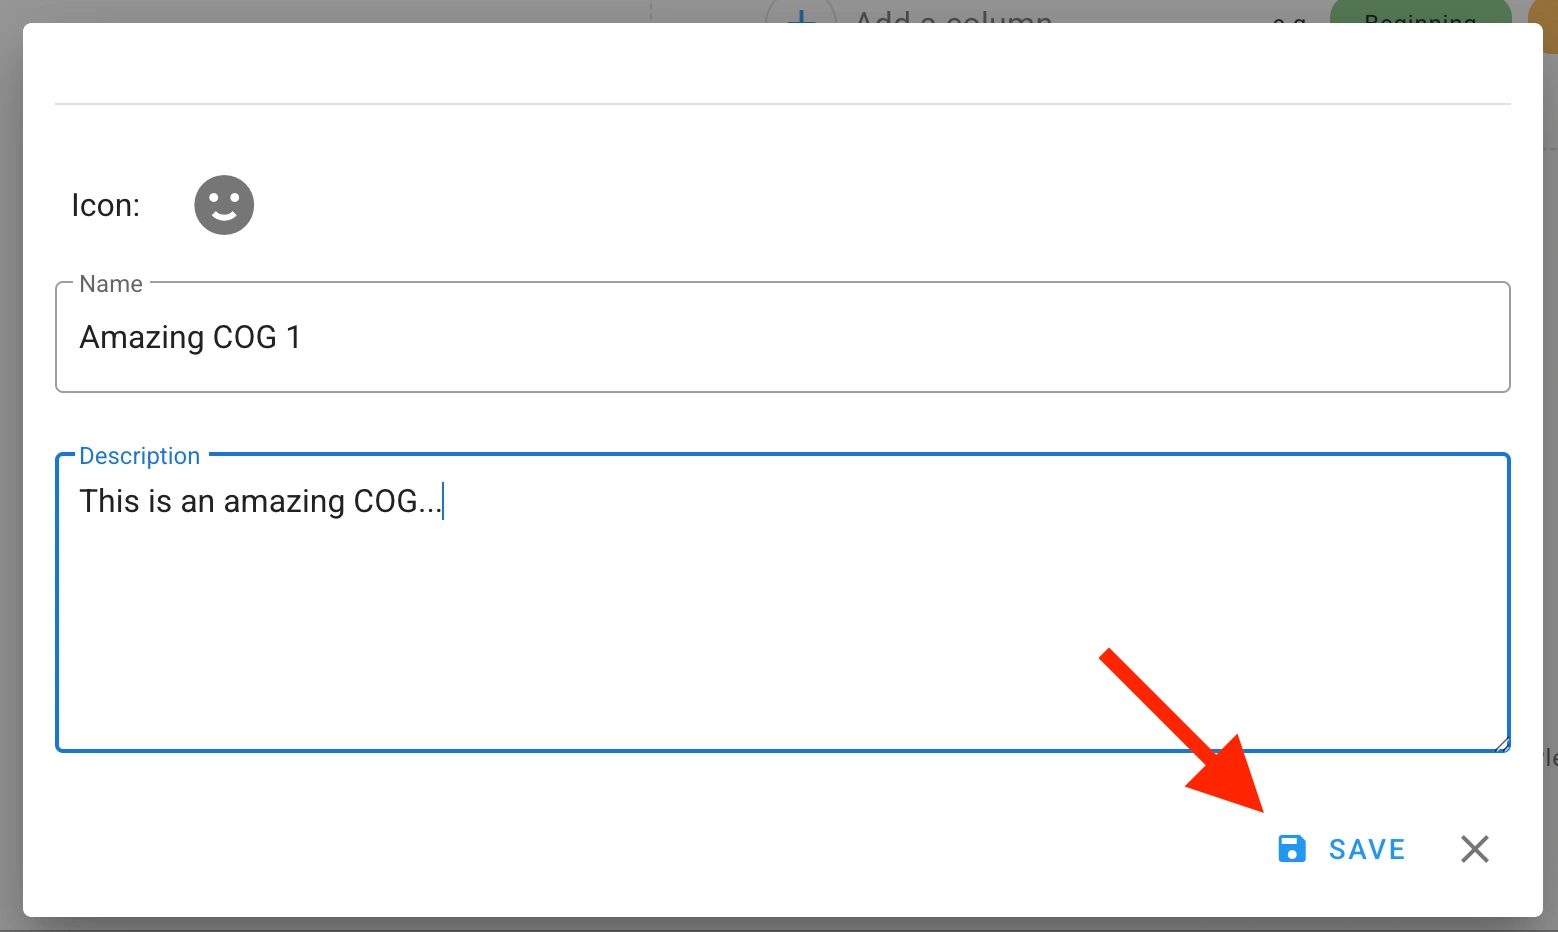
For each COG, enter a name and select an icon. When you’re ready, hit ‘SAVE’.
At the top, add a column for each level by clicking the blue ‘+’ circle.
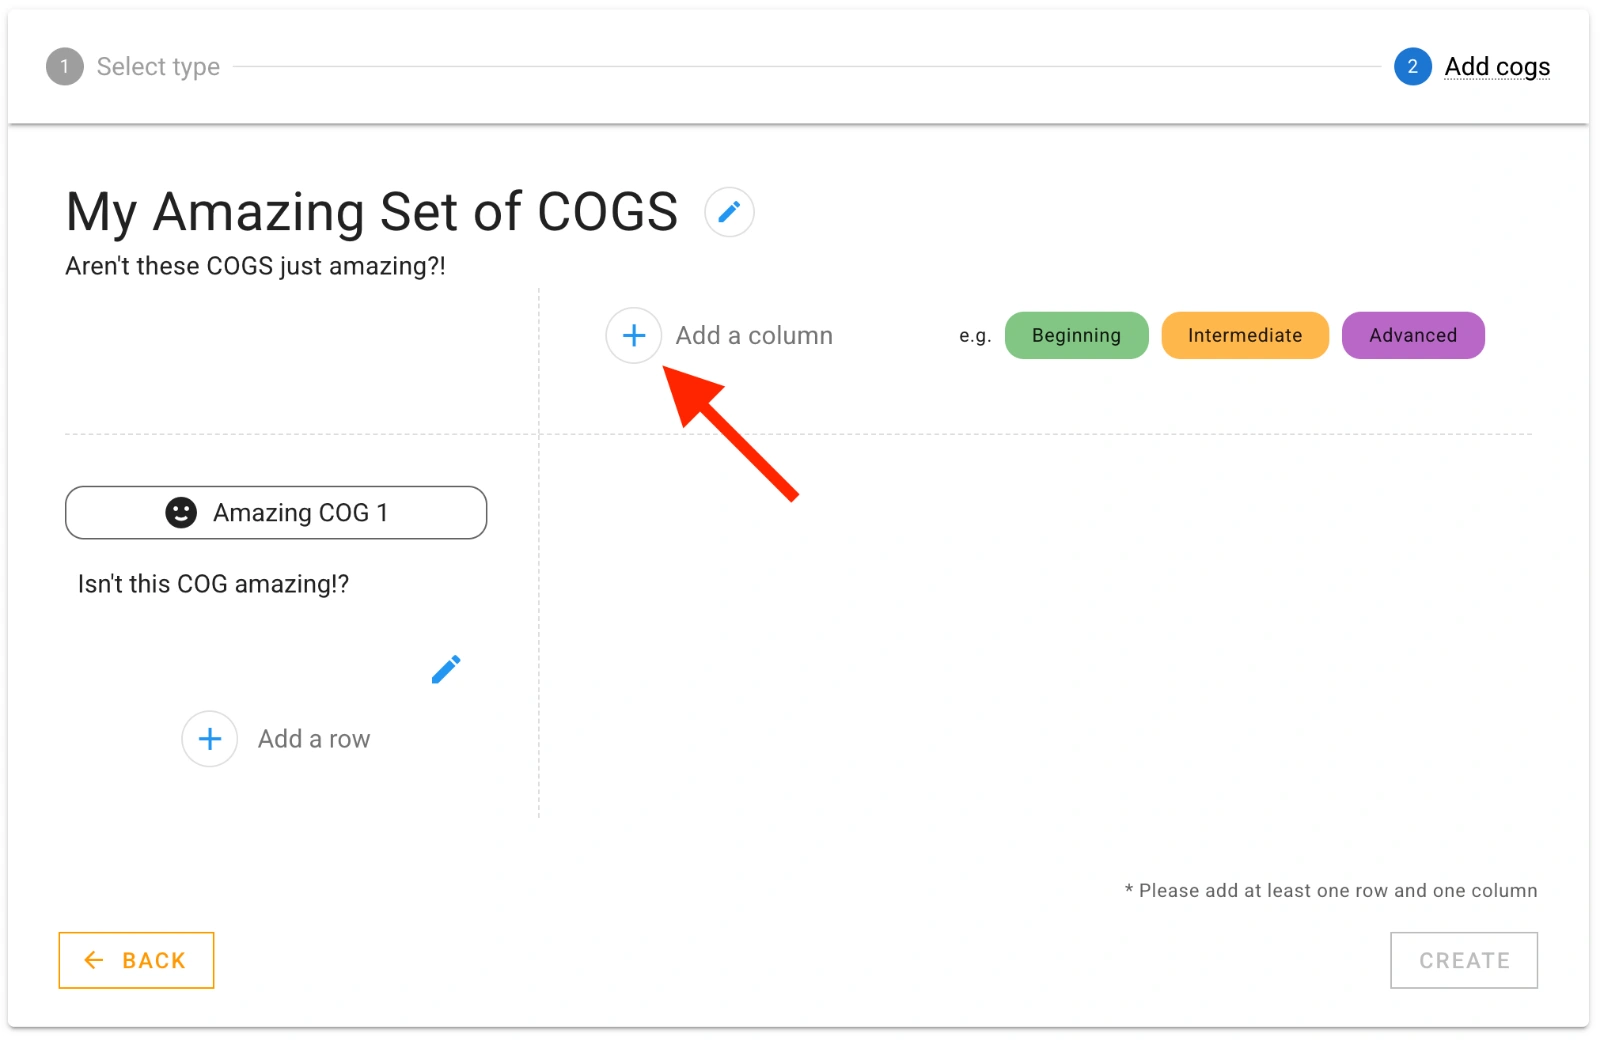
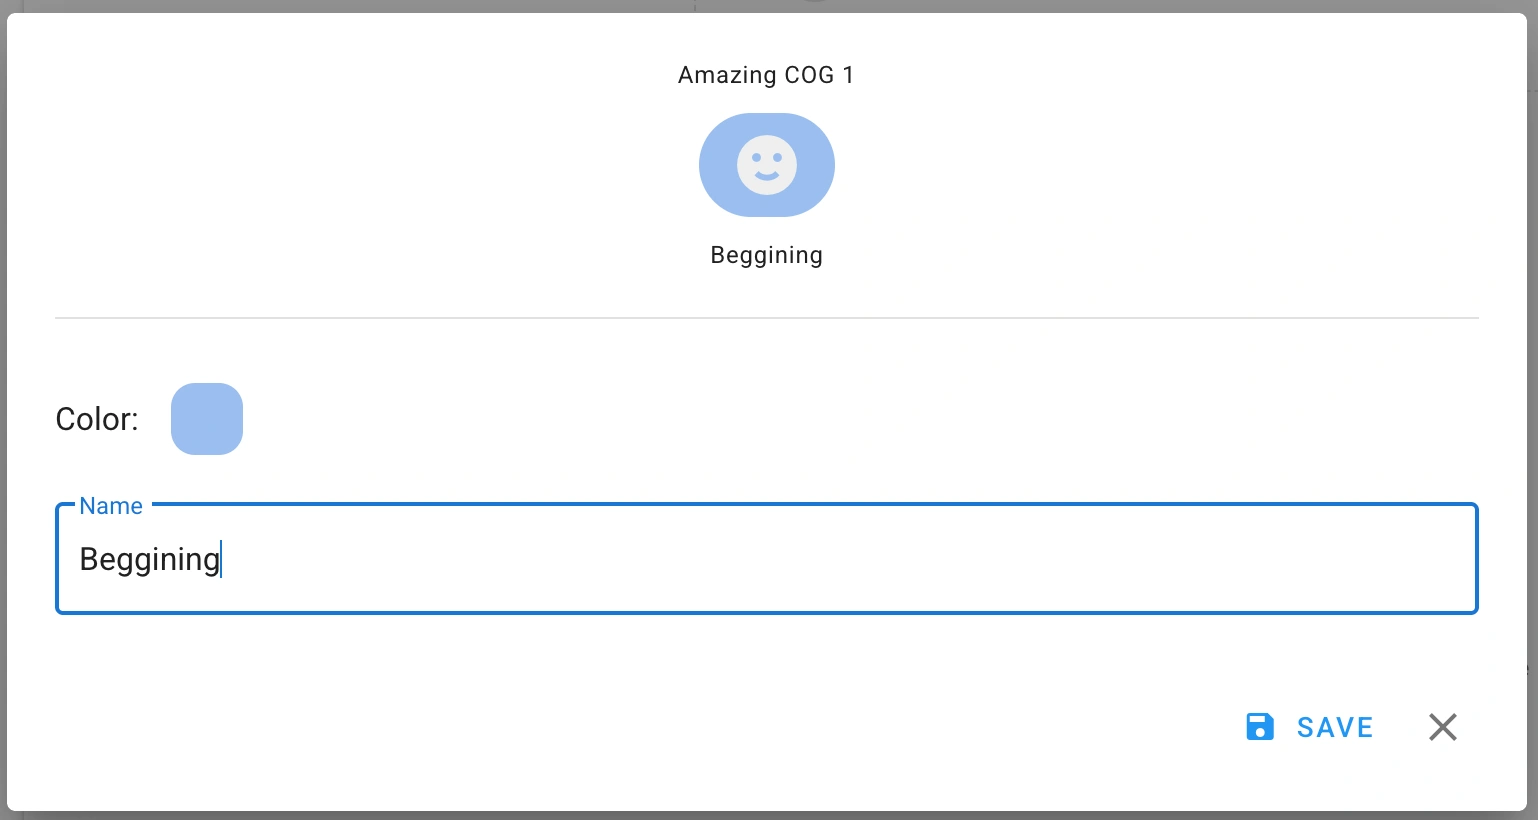
For each column/level, add a name and choose a color. When you’re ready, hit ‘SAVE’.
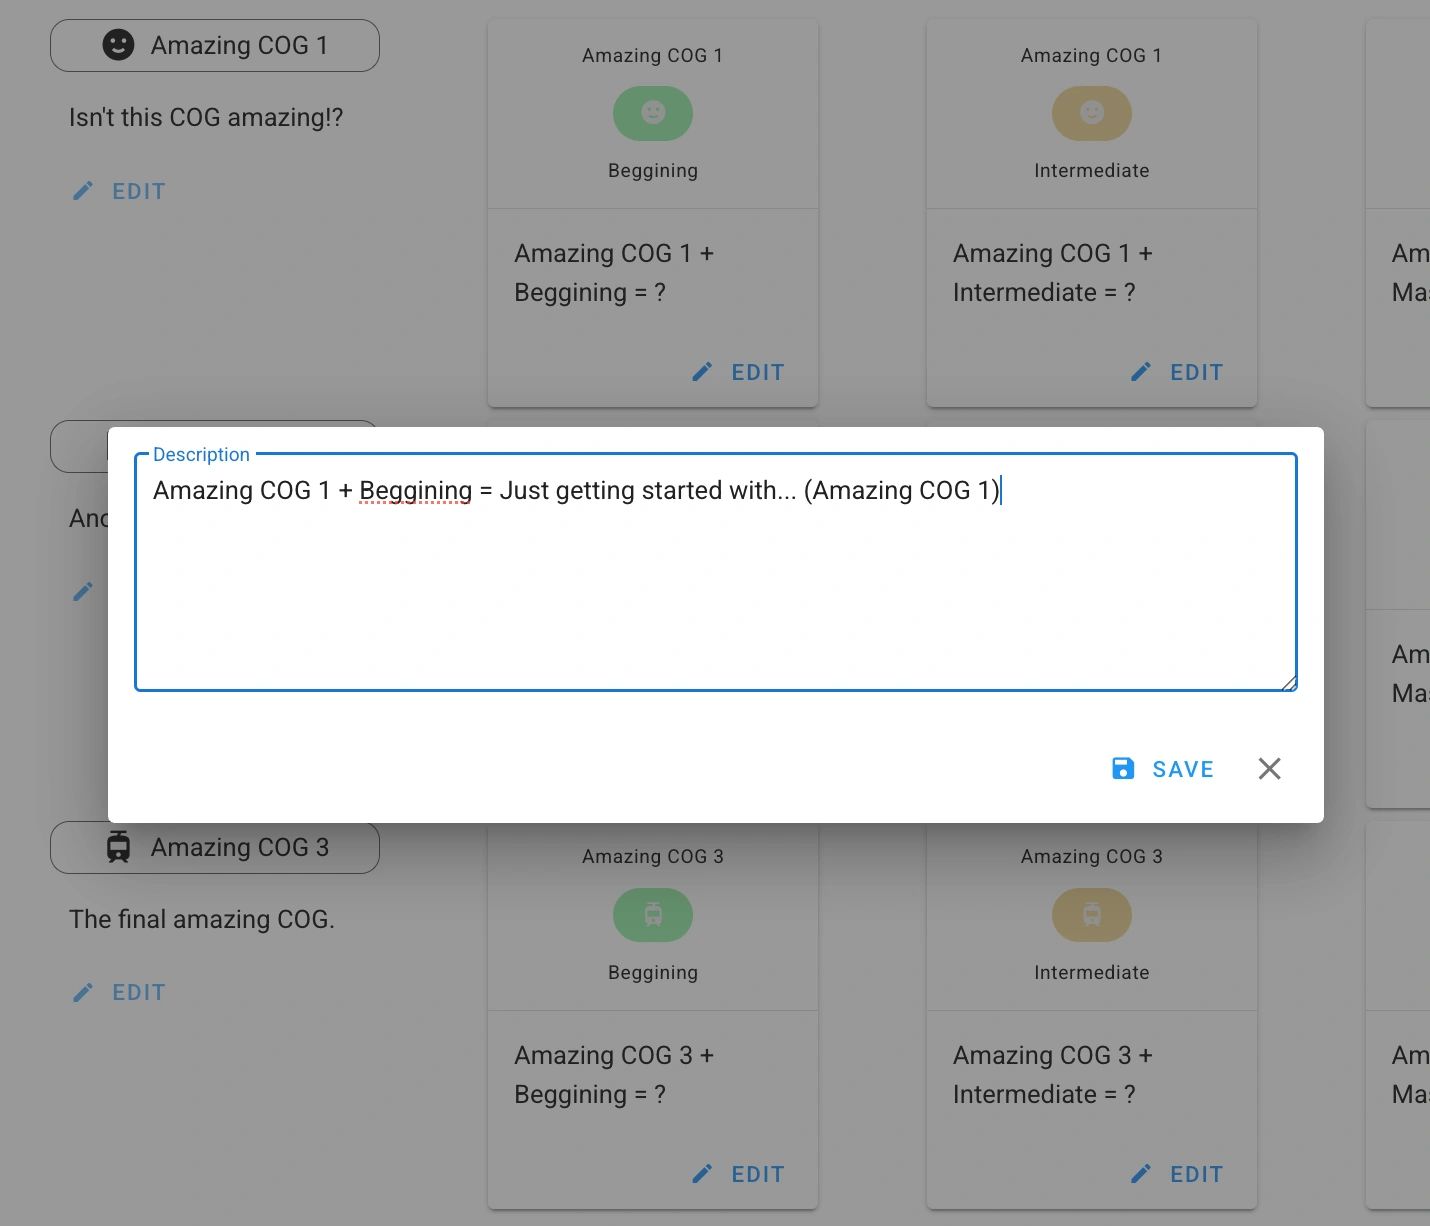
For each COG/level combination, add a description by clicking the blue pencil ‘EDIT’ button. These descriptions can help learners understand what each level of the COG means in terms of expectations or competency.
After all COGS and levels have been added, click the ‘CREATE’ button in the bottom right to finish.
Step 3: Add cogs to the appropriate groups/classes
In order for COGS to show up to members of a group, the COGS must be added to the Group. To do so follow these steps: How to Add or Remove COGS to a Group/Class.